A store item can have a price, that is what comes in as revenue when you sell. And, if you have to clarify your pricing, you can add a price description to a product in your GonnaOrder dashboard. Also, as a store owner or manager, you choose to discount some products in order to boost sales or clear inventory. However, prices and discounts are not mandatory in GonnaOrder.
On This Page
Set Price for an Item
Each store product can be associated with a price. The price field indicates the amount of money in a selected currency that the customer should pay to get the product if no discount is awarded. It is a good practice to add a price to every item.
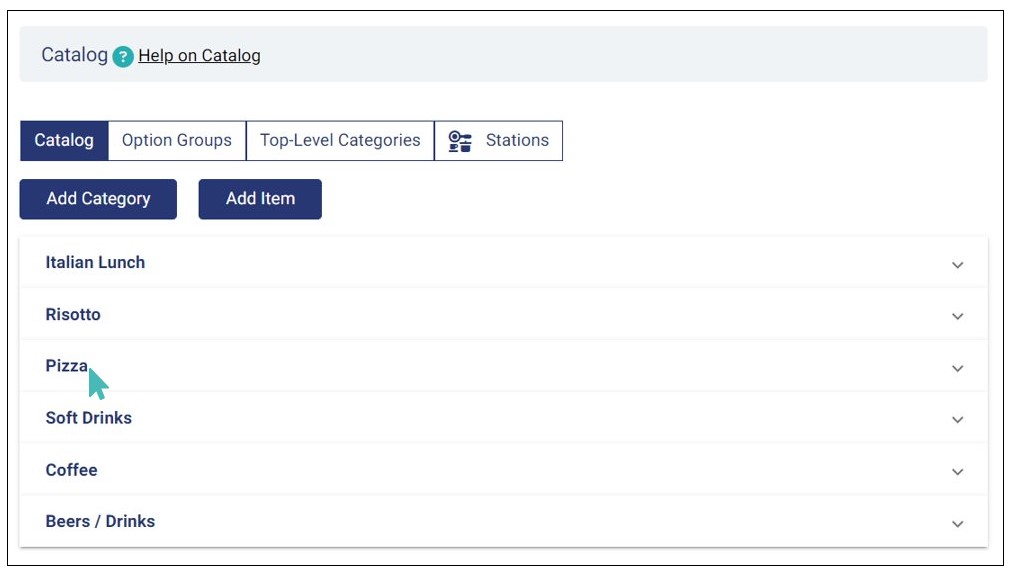
To Set up the price of a store item, go to Catalog and select the category in which the product is placed.
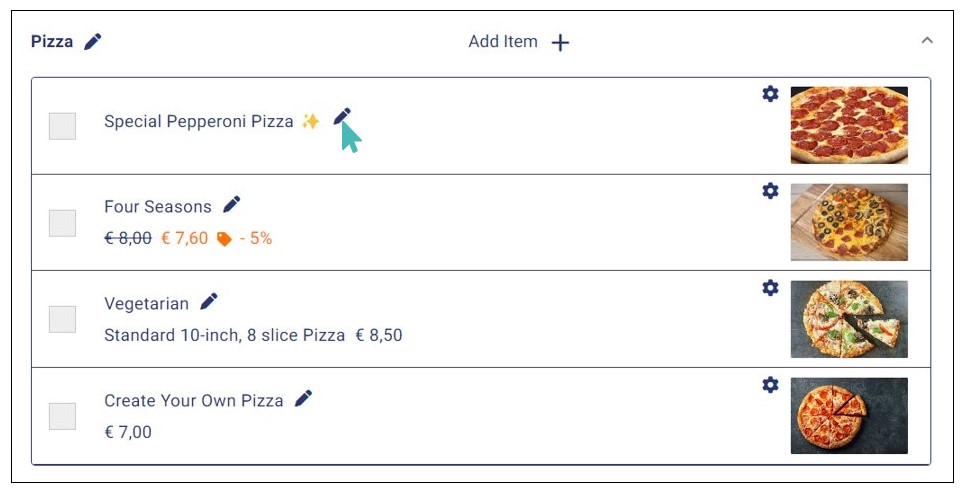
Click on the edit icon of the specific item for which you want to set the price.
Scroll down to Price and add your desired price for that item. Prices can be whole numbers, decimal numbers, or negative values. The currency used for prices in your store depends on the country or region where your store is located. It is automatically selected on store creation.

Once you have set the desired price, click Save.
Tip
Store items, price variants, and options can have negative prices. Items offered to customers for free can have a 0.00 price.
Add Price Description (Optional)
A price description is more of a comment on the price of a product. It is a good place to provide your customers with additional information about pricing. For instance, you may inform the customer that the price of the product is inclusive of VAT or the price covers a certain amount/quality of the store item. The price description is especially useful if you want to add price variants to an item.
To add a price description to a store item, scroll down to Price Description in the product details screen just below the item price. Enter a relevant description and remember to save the changes.

Discounts (Optional)
The discount section provides a way to reduce the price of individual store items for customers. It is a way of giving back and attracting more sales. GonnaOrder has two primary discount types:
-
- Monetary Discounts: Examples: €5, €10, €15, €50, €100 etc.
- Percentile Discounts; Examples: 5%, 10%, 15%, 75%, 100% etc.

By default, no discount is selected on an item.
Add Discount to Products (Optional)
You can add a price discount to individual store items. The discount can either be monetary or percentage. Also, you can let the item discount be available at all times or restrict it based on a schedule.
If you want your item discount to be available at all times, do not select any schedule once you choose your preferred discount type.
For Monetary Discount add the value of the Discount for your product.

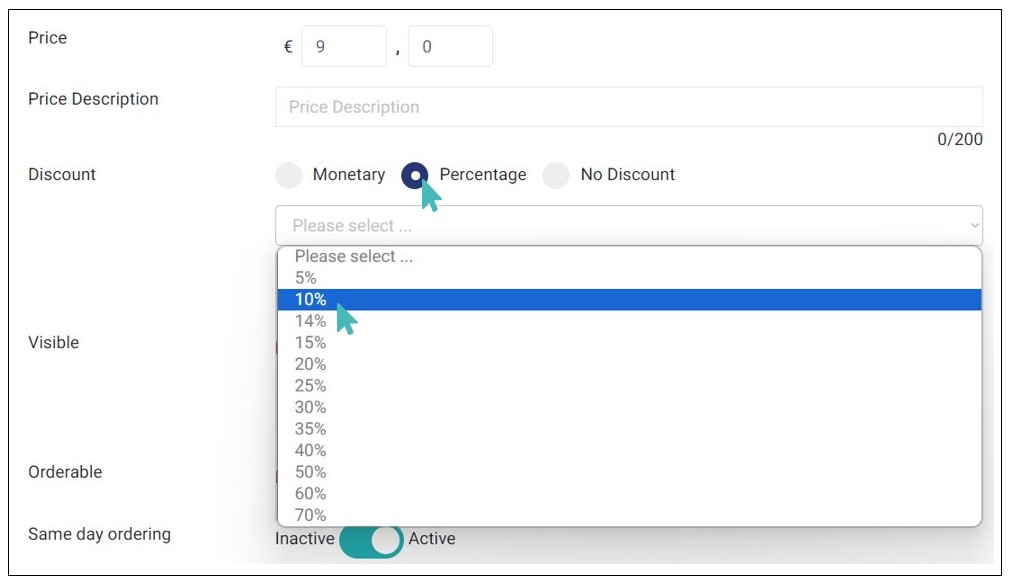
For Percentage Discount, choose the preferred discount percentage from the dropdown list.
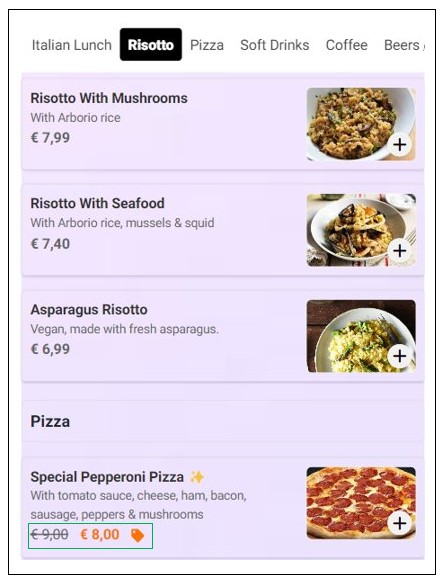
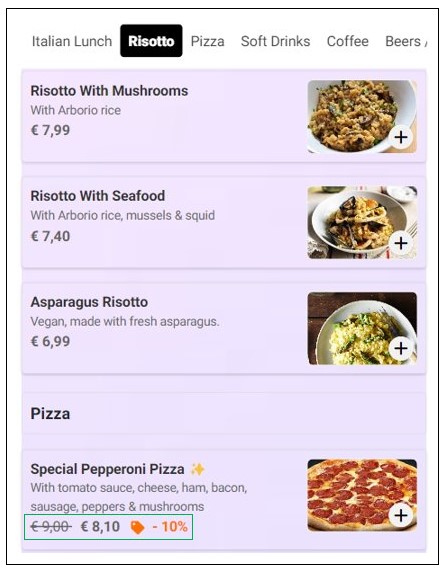
After setting the discount type and discount value, click Save to save the changes. Customers should now see that the item has a percentage discount when they view your store’s menu.
Restrict Item Discount Availability Based on Schedule
As initially stated, you can restrict item discount based on a schedule. This means the discount will only apply if the item is ordered or has a wish date and time that is within the selected schedule’s timelines.
For instance, if you offer Friday specials for a specific product, you can set an item discount (monetary or percentage) and choose a schedule that meets your desired timelines when you need the discount to be applicable (e.g., Friday, 1100 – 1500hrs).
To restrict an item discount based on a schedule, first select the discount type (Monetary or Percentage) and enter the desired value.
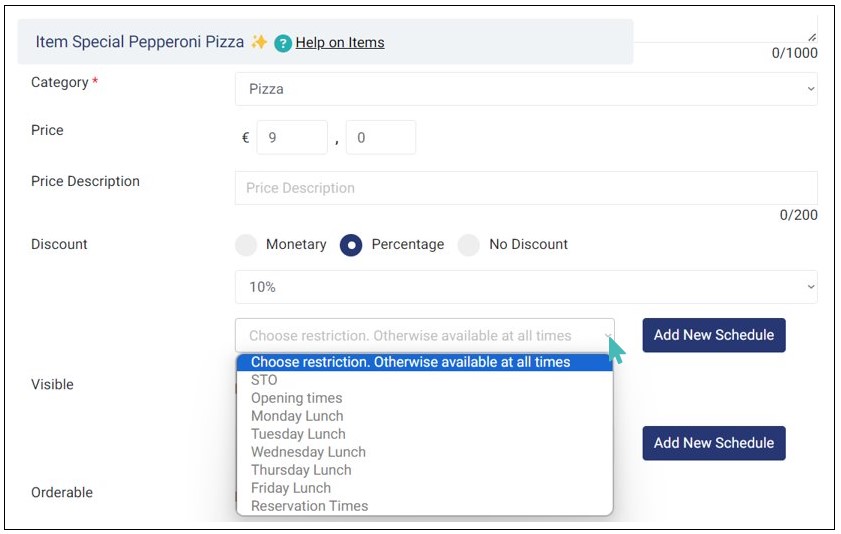
Next, choose the desired schedule within which the item discount will be applicable from the dropdown list and click Save. If none of the schedules in the dropdown list meets your requirements, create a new schedule by clicking Add New Schedule.
Let’s say you select Friday Lunch schedule, whose start time is 1100hrs and end time is 1500hrs on Friday.
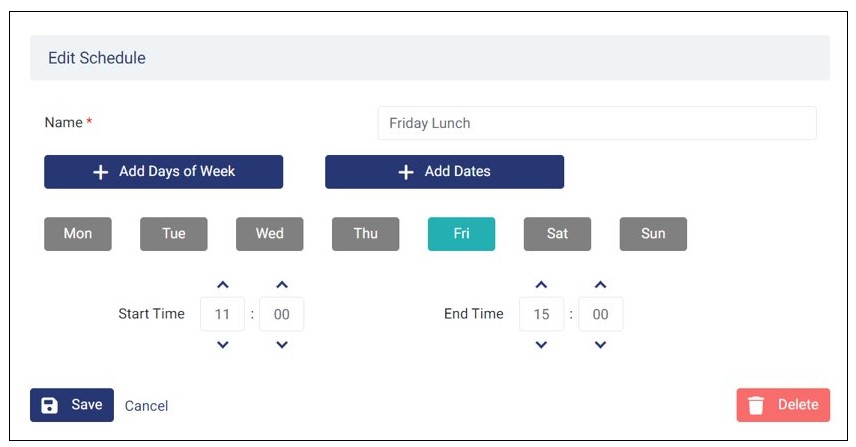
In that case, the 10% discount on item Special Pepperoni Pizza will be available within the said time on Friday. Otherwise, the discount will not be available or visible in the customer UI.
Deactivate Item Discounts
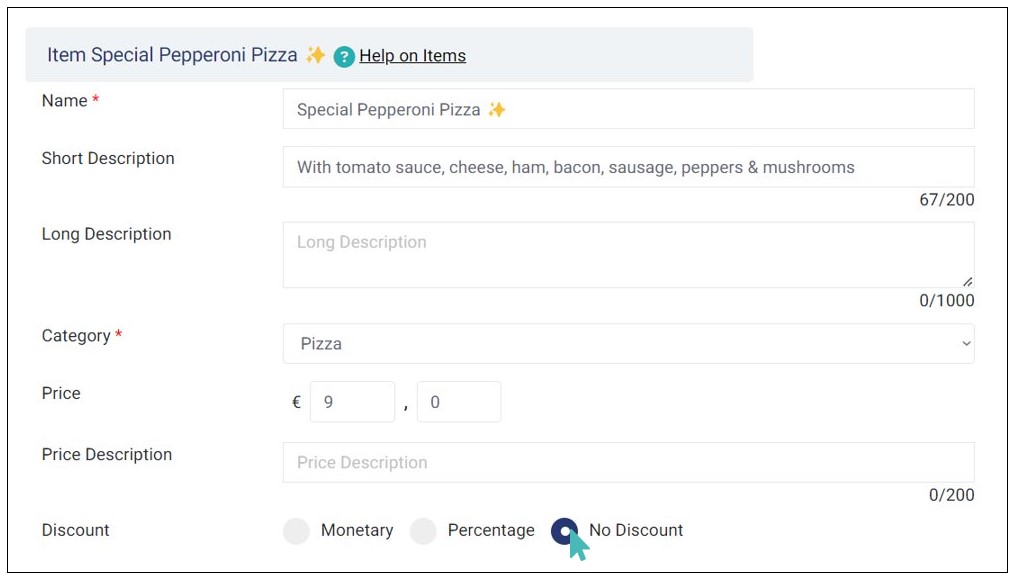
If you no longer want to offer item discounts at all times or based on a schedule, you can deactivate it easily from the item details page. Simply go to the item you want to remove the discount and select No Discount on the Discount section.
Tip
Make the best use of discounts. If used properly, price discounts can lead to more sales.

