Top-Level Categories are a way for you to group the menu items in such a manner that it makes it easier for the customers to search and place an item for order.
Top-Level categories can have following segregations for example:
- Appetizers
- Soups
- Salads
- Breads
- Beverages
- Alcoholic
- Non-Alcoholic
and so on.
On this Page
- Add a Top-Level Category
- Rearrange Top-Level Categories
- Associate a Category with a Top-Level Category
- Add Categories to a Top-Level Category
- Preview the Top-Level Category
- Update Top-Level Categories
- Delete Top-Level Categories
Add a Top-Level Category
You can create top level categories, to group the menu items under a top category. To create a top-level category, click Catalog on the left menu and then select Top-Level Categories tab. Next, click the Add Top-Level Category button to proceed.

Enter the required details on the Create Category page that appears.
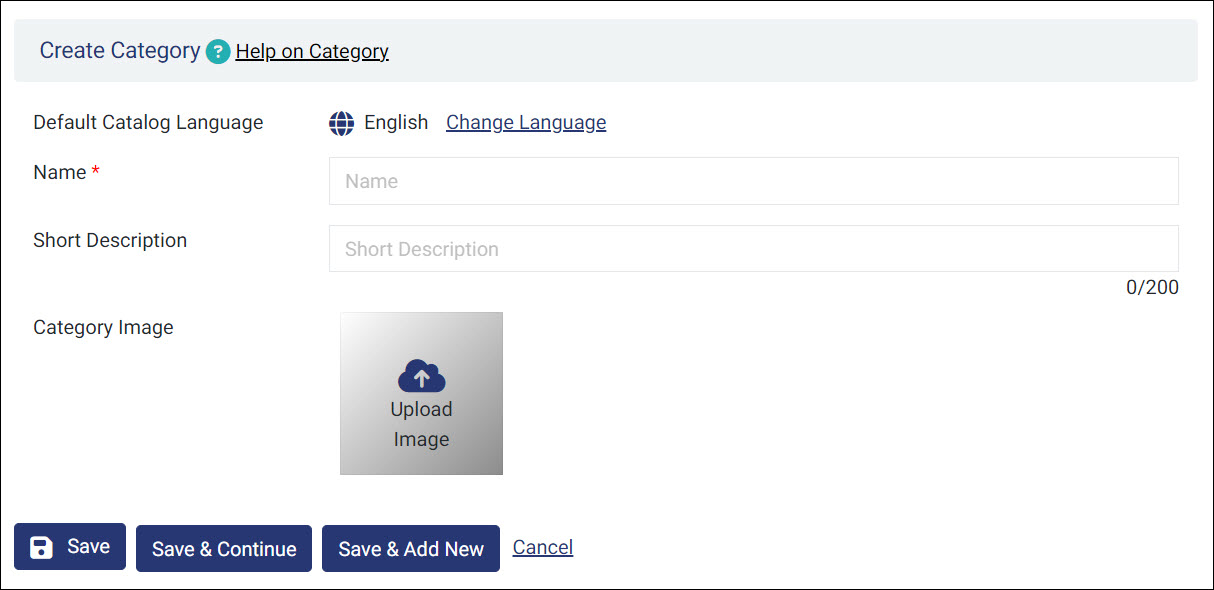
The following information is displayed on this page:
- Default Catalog Language: By default, the top-level category will inherit the language of your store, to change the language, click on Change Language.
- Name: Provide a name for the category. It should be short and easy for your customers to understand. In a case where a category can be referred to with several names, you should choose the one that is widely known or one that customers in your locality would best understand
- Short Description: This field is where you add a short description of the top-level category (up to 200 characters). It will help your customers understand what products they will find under this category. Note that the short description will appear as the first item in your category, and all products will appear below it.
- Category Image: Each Top-level category in the menu can be represented by an image. Click Upload Image to select and add an image to the category.
GonnaOrder recommends certain guidelines while adding images to the store, including an image size of 575x384px. Refer to the Product Image Guidelines section of the Add Images to the Store article.
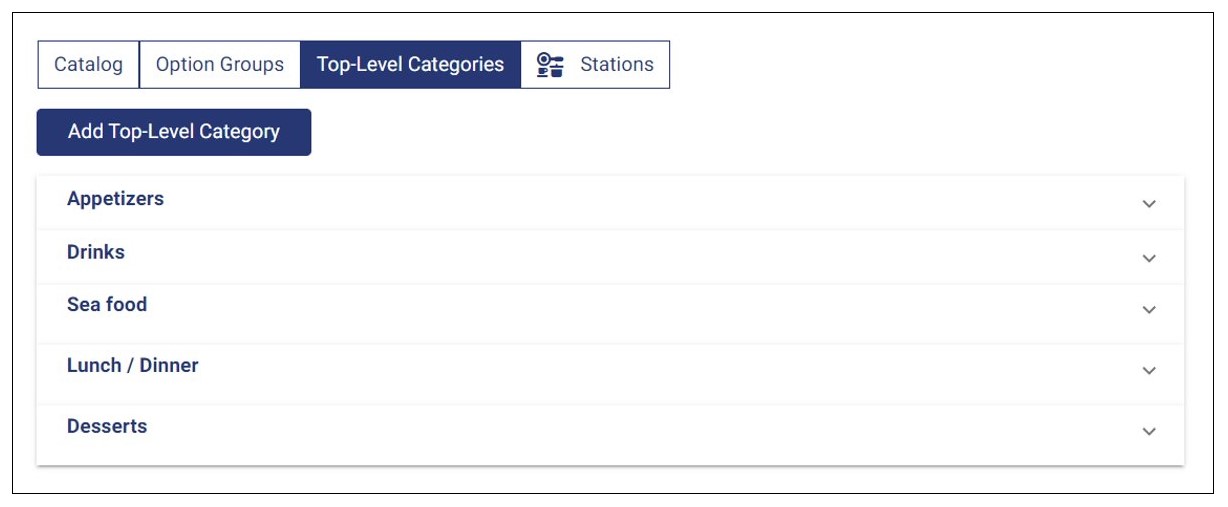
Click Save to save the Top-Level category. Repeat the above steps to add multiple top-level categories. Once the categories are created, the Top-Level Category page should look like this:
Rearrange Top-Level Categories
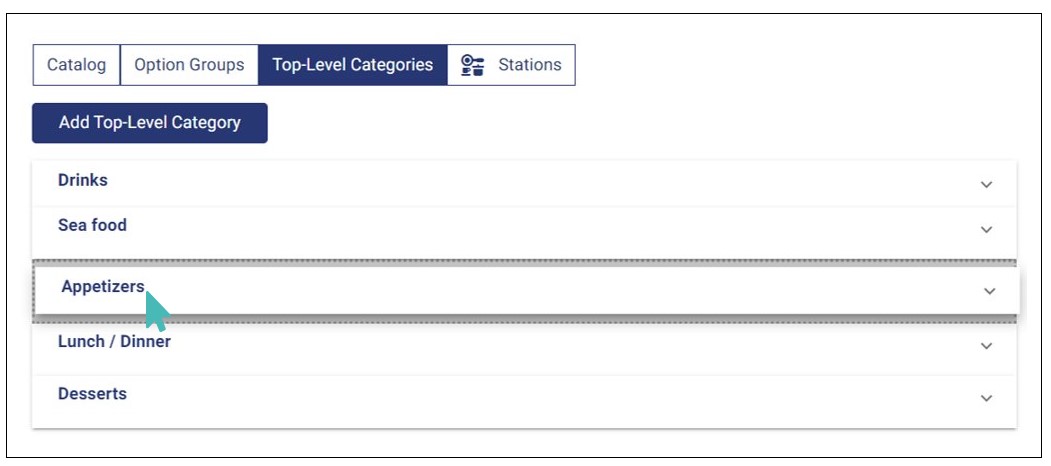
You can re-arrange top-level categories as you want. The list on this page will reflect them in the same order in the order capture page as well as the customer interface.
To change the order, long press the category you want to rearrange and drag it to the preferred position on the list.
Associate a Category with a Top-level Category
Once the top-level categories are added, you can now assign categories to them.
Navigate to the Catalog page, if the categories are not already created you can create the category and then add it to the top-level category. If the categories are already created, then click the category you want to be grouped under the top-level category.
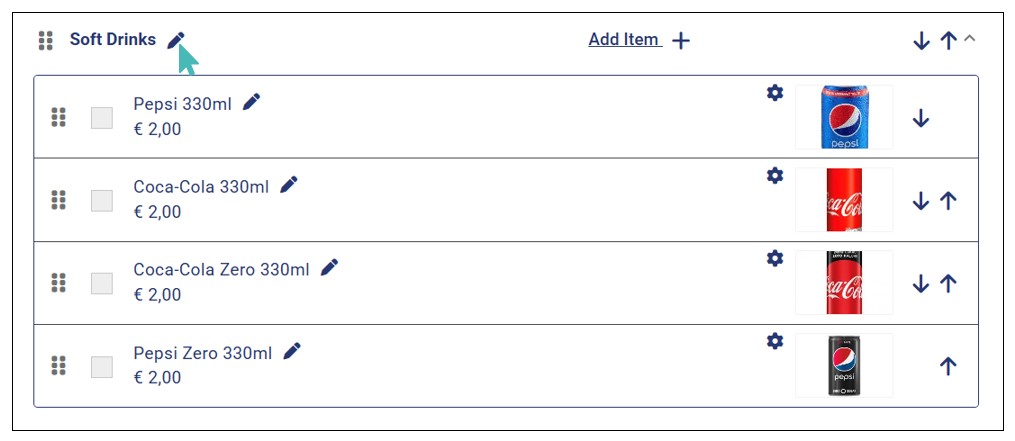
In the Category details page, select the top-level category from the Top-Level Category dropdown. For example, in the below image, Soft Drinks can be asigned to the top-level category Drinks. Once you, have selected the top-level category, click Save for the selection to take effect.
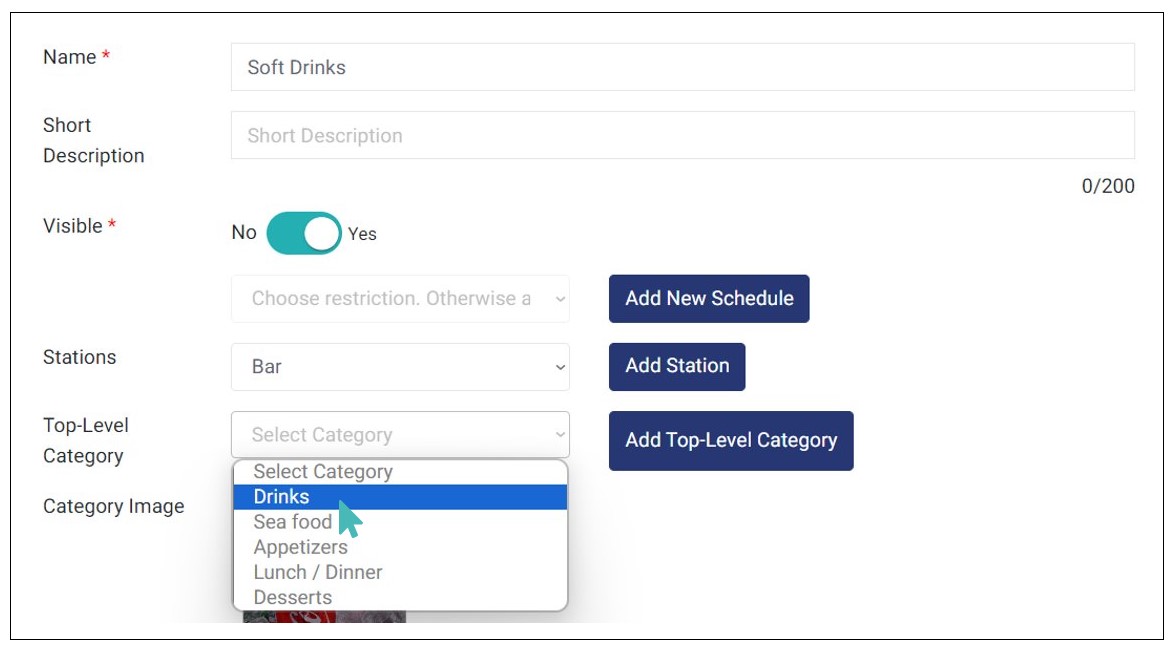
Repeat this process to group the menu items under the top-level categories you created.
Add Categories to a Top-Level Category
Apart from the method of assigning a category to a top-level category discussed in the above section, you can add categories to a top-level category directly from the Top-Level Categories tab. Simply click the top-level category you want to add a category and click the Add Category button.

Next, enter the category details on the Create Category page and click Save.
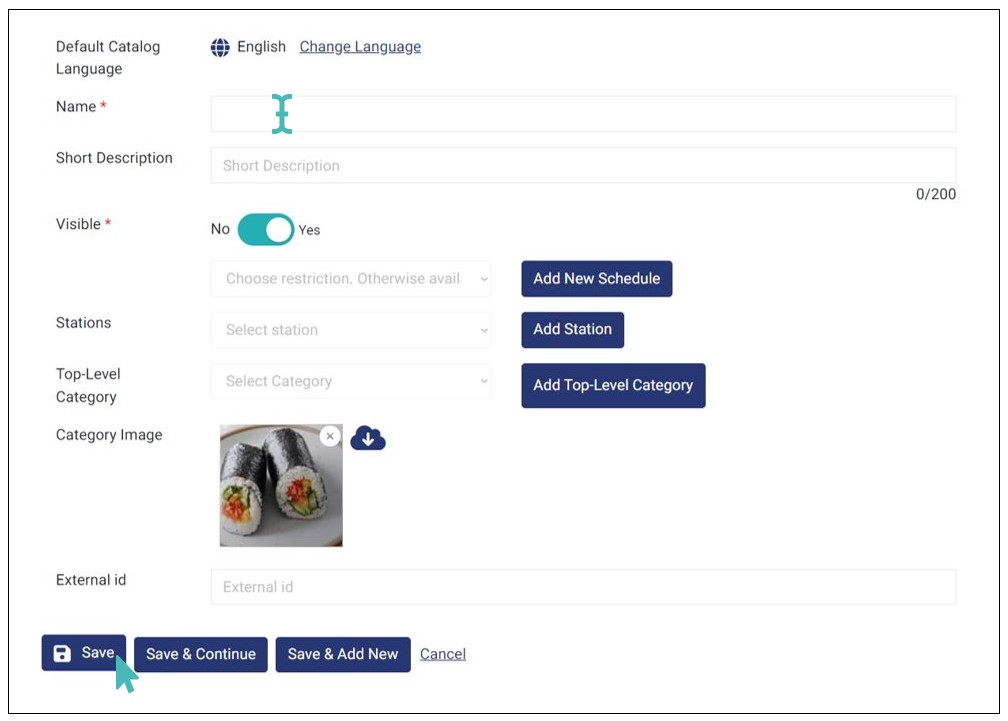
When you use this approach, the category is automatically assigned to the top-level category you selected even if you do not make any selection on the Top-Level Category field
Preview the Top-Level Categories
You can view how the distribution and grouping under the top-level categories looks on the customer interface by navigating to Share and Preview. Click the store link to view the customer interface.
If the menu is created with the top-level categories, then the menu should look like the below image:
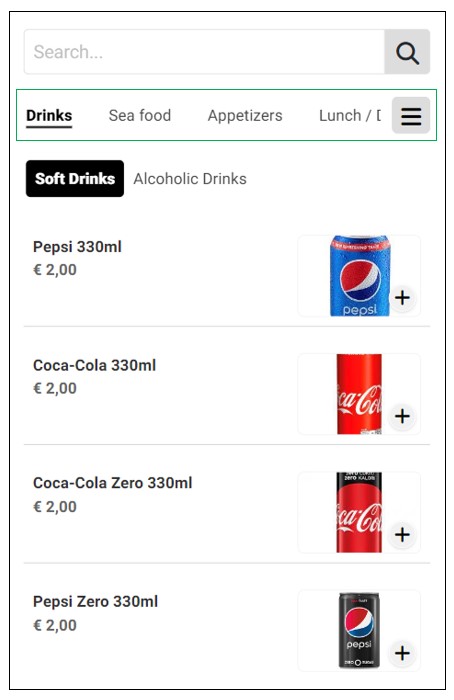
Click on the three-horizontal lines to view the list of all Top-level Categories.
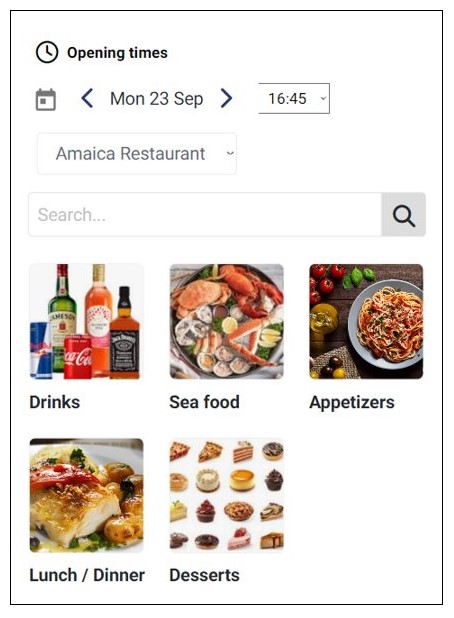
You can click any of the top-level categories to expand and view the list of items within them.
Update a Top-Level Category
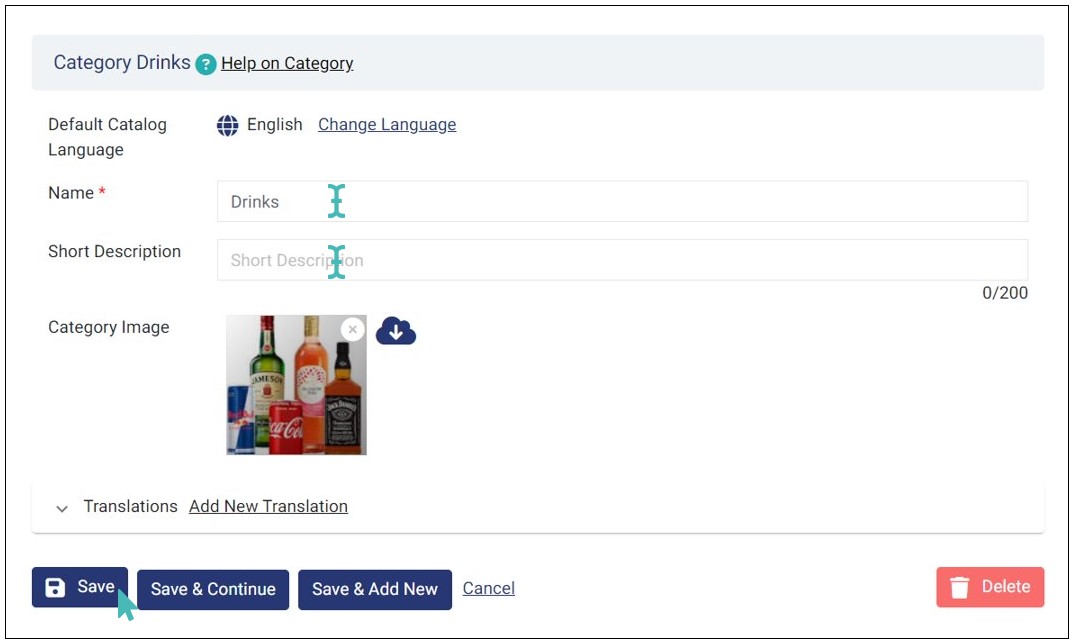
You can update the top-level category as required. This could be for simply adding a short description or changing the Name or to add an image. To update the Top-level category, navigate to the Top-Level Category and select the category to update. Modify or add the information required on the category page that appears and click Save. Any changes made will automatically reflect in the order capture page as well as the customer interface.
