Images can sometimes represent your products better than words. They can provide a visual appeal making your store items attractive to customers. You should only use high-quality original images of products available in your store.
On this Page
- Add Images To Categories
- Add Images To Store Items
- Download Product Images
- Delete Product Images
- Product Image guidelines
Add Images to Categories
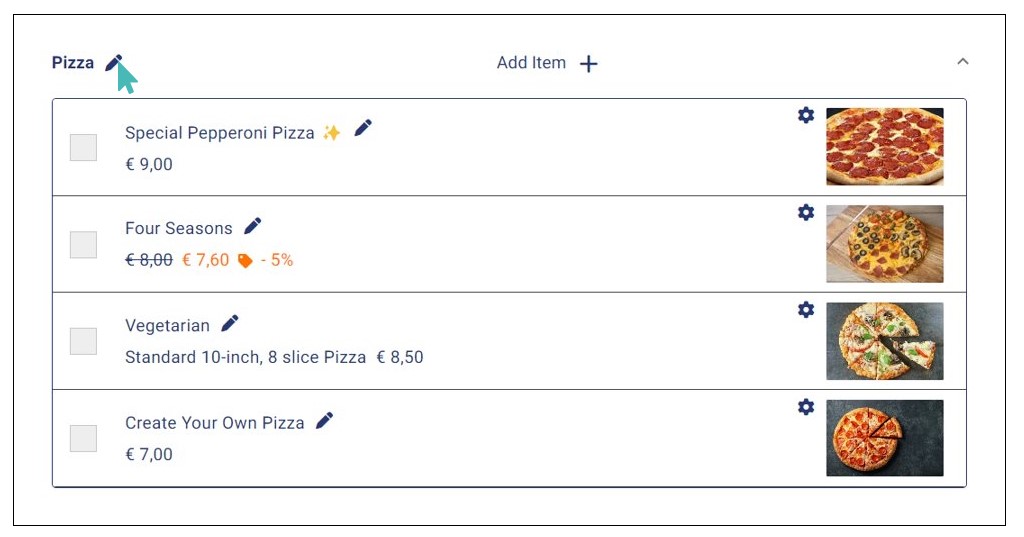
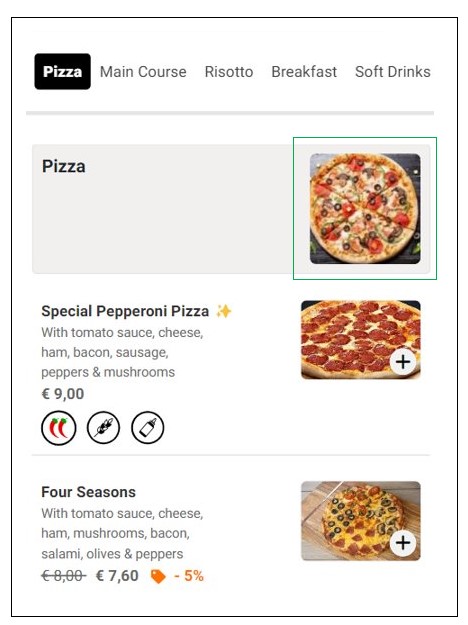
Every Category in the Catalog can be represented by an image that defines the overall items in this category. To add image to the category, expand the category, click the Edit icon.
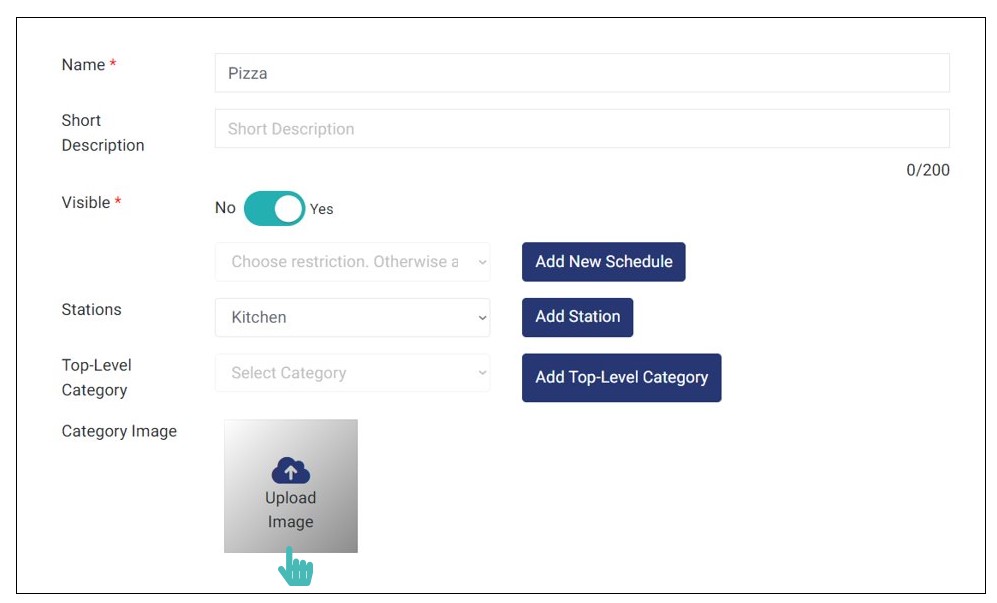
Under Category Image, click Upload Image to add image to the category.
Click Save once the image is successfully uploaded.
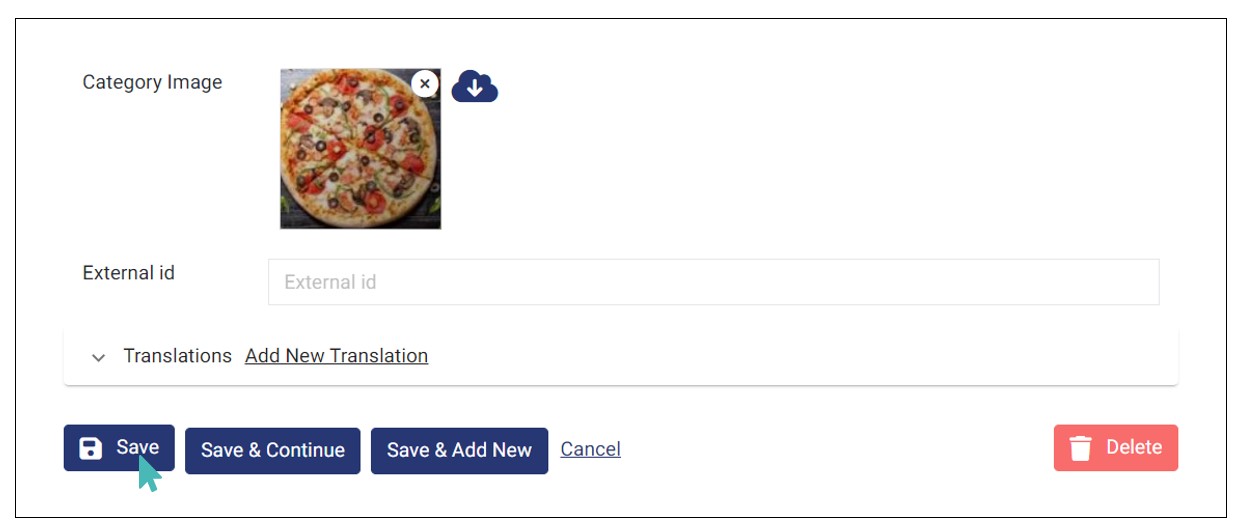
The category image is visible only at the Order capture for waiters and at the orders page for customers.
Add Images to Store Items
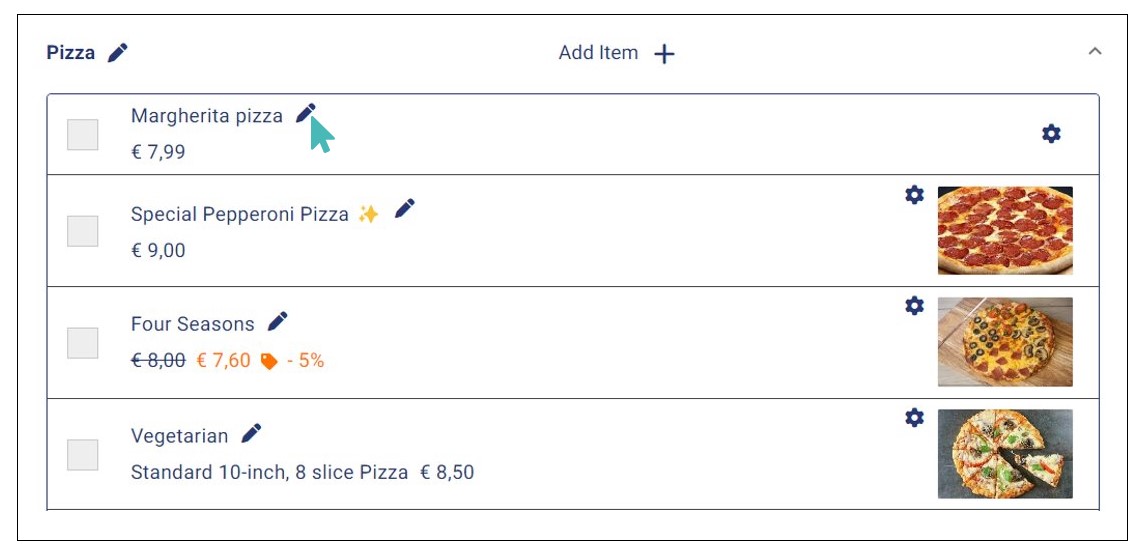
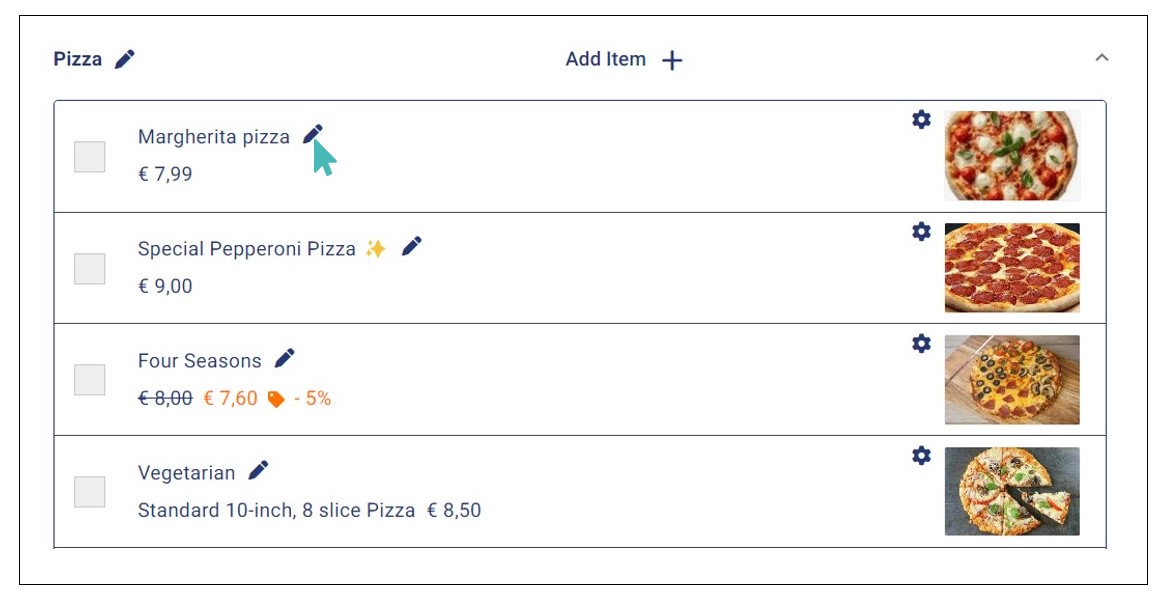
Every product in your store can be associated with an image. Images improve the outlook of your store. To add images, click on the name of the category in which that product is placed. For the example case, we are adding an image to an item under the Pizza category.

Locate the product to which you want to add an image and click on the Edit icon next to its name.
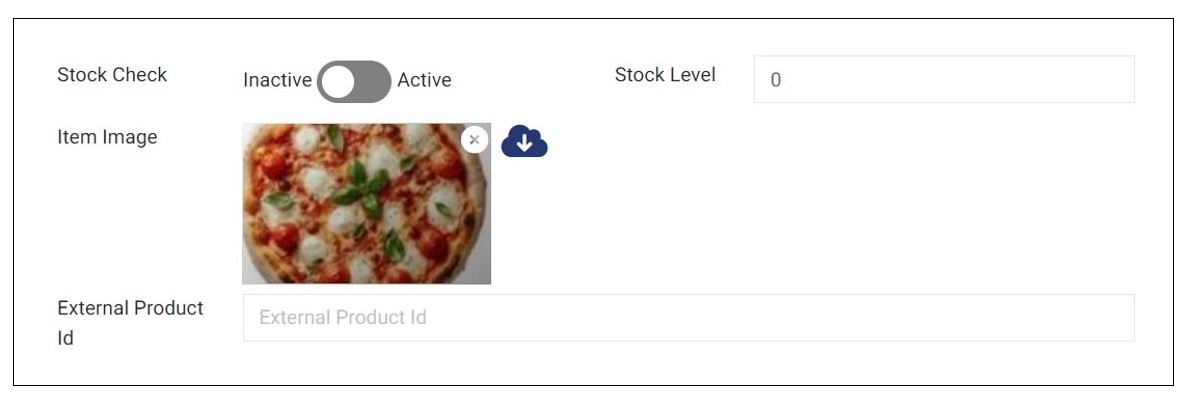
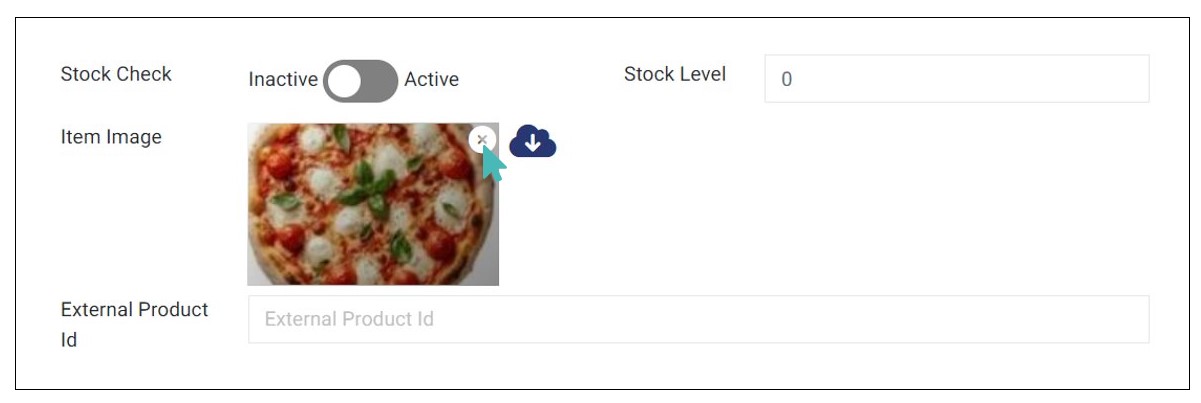
Scroll down the item details until you find the Item Image section. Click Upload Image then choose the image from your local folder if you are uploading images for the first time. If it is not the first time, your product images might already be in your store.

After uploading or selecting the image, click on the Save button.
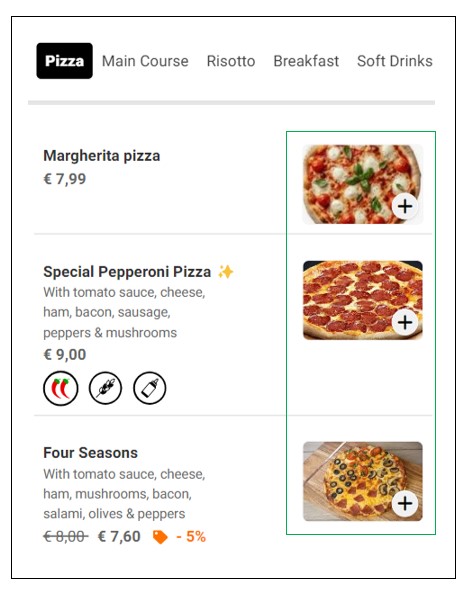
The item images appear not only in the admin catalog but also in the customer interface and the order capture page for waitstaff.
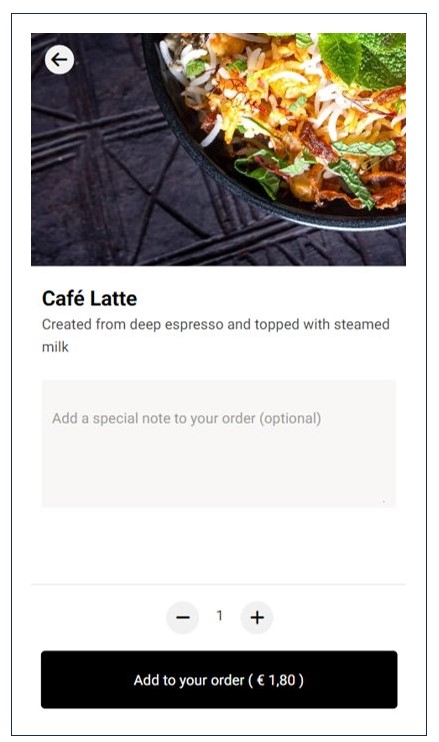
Customers can also view individual item images on the item details page.
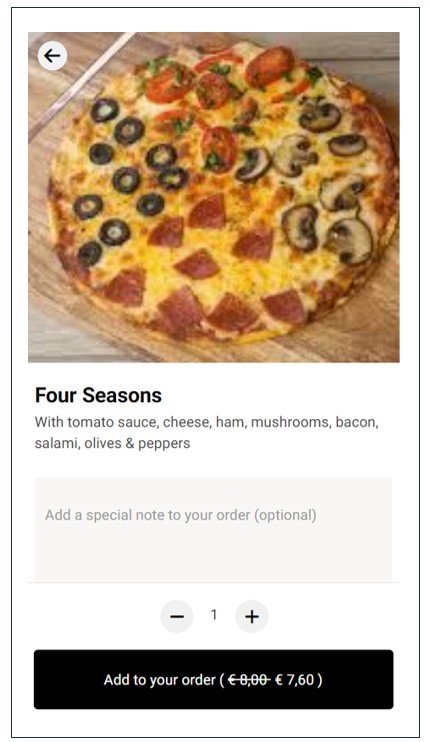
If you do not add an item image, then the store image is displayed on the item details page.
Download Product Images
All item images uploaded to your store as explained in the previous section can be downloaded to your local computer at any time. This is useful for cases where you have accidentally deleted the original images or when you lose access to the computer where you had saved them.
Each image can only be downloaded separately. Therefore, you will need to navigate to each of the items whose images you want to download and click on the Download icon next to the image.

Delete Product Images
You may want to delete images associated with products from time to time depending on various reasons. It simple to remove a product image as you will see in this section.
Head over to the store and select the item whose image you want to delete from the catalog and click on the Edit icon next to its name.
This should bring up the item details page with all the relevant information. While on this page, scroll down to find the item image. There is an X symbol on the top right corner of the image and which you should click to remove the image permanently. Note that this action is irreversible and the store will not confirm if you really want to delete the image. Instead, you will only get a success message indicating that the image has been removed.
Product Image Guidelines
Item images should be ideally in a ratio of 3:2 – where 3 is the horizontal dimension and 2 is the vertical dimension. The closer that the picture is to this ratio the better it will be displayed. Menu items are always displayed in this ratio and images with different width-height ratios will be resized to fit.
The recommended image size is 575x384px, but any pixel size above this is acceptable and the image would be automatically fitted to the above-mentioned dimensions.
Recommended Image Size and Formats
GonnaOrder accepts images up of to 5MB in size. However, GonnaOrder recommends that you upload images between 10-20 KB to optimize loading time.
You could use some free and simple online tools for reducing your image sizes such as https://tinypng.com/. Remember the faster your store loads the better user experience will be provided for your clients.
GonnaOrder supports png, jpg, and webp formats though it is recommended that you use png formats for images as they are more optimized for web viewing.
Tip
GonnaOrder will try to resize all images as much as possible in order to reduce the loading time for your store. Still, you should use online tools to reduce the size in Mb or Kb of your images before uploading.