GonnaOrder provides you with a dashboard where you can view and manage orders placed in your store. The Orders page shows you a list of all orders that are submitted to your store. You can click on any order to view the details, accept, reject, and print or download receipts, to mention a few.
On This Page
- View the List of Orders
- Order Statuses
- View the Details of an Order
- Change the Payment Status of Unpaid Orders
View the List of Orders
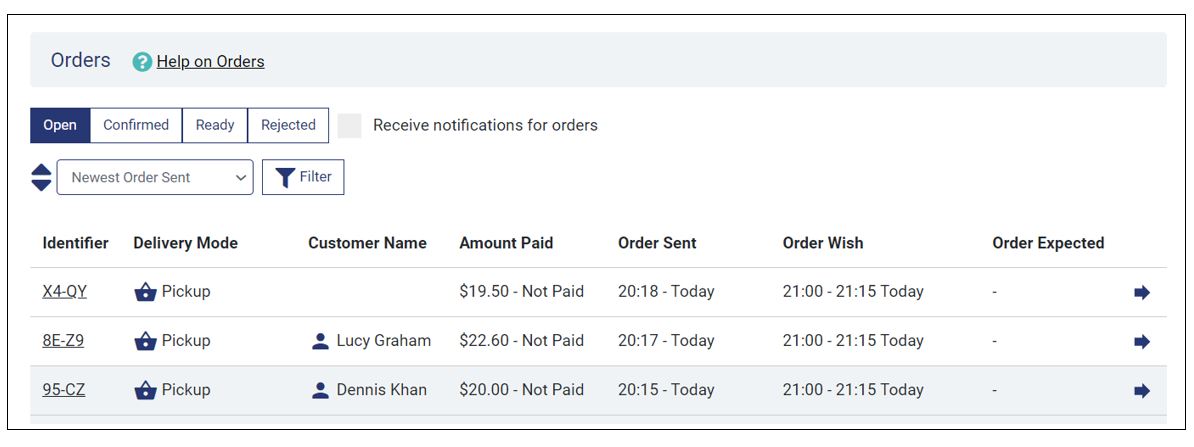
The order overview page provides the list of orders you have received from customers. By default, new orders are displayed first on the list. The list is automatically refreshed; whenever a new order arrives, it will be shown at the top. You can recognize a new order and start the fulfillment process. The image below shows how the order dashboard appears and the fields therein. In the upcoming sections, you will learn more about the order dashboard and the order list. The order dashboard is accessible from the store menu.
Order Fields
Order Fields is a combination of information filled by the customer and that generated by GonnaOrder to identify each order. The details are displayed on the order dashboard for store users. Below is an image showing the order fields, whose explanation follows immediately.

- Order Identifier: This is a unique identifier of an order placed in your store. It is automatically generated and allows you to communicate order numbers with your customers and internally with your employees. This identifier is also shown to the customers when placing their orders. It is also included in their order confirmation email.
- Delivery Mode & Location: There are three types of orders in GonnaOrder stores: Pickup , Serve , and Deliver. Pickup orders are those where customers wish to pass by your store’s physical location and pick up their order. Serve orders are served at tables within your premises, while Deliver orders are where a rider will take the order from the store and deliver it to a customer’s preferred location. Serve orders are associated with specific tables in your store from where a customer placed the order. Delivery orders are associated with a location where the rider will find the customer.

- Customer Name: The name of the customer placing the order in your store appears right after the delivery mode. All orders where the delivery mode is set to deliver will have customer names, but those others may not, but that depends on what customer you have set to be mandatory for these modes.
- Amount Paid: This field is a combination of the order value and payment status. This is the total amount of the order and a text showing whether the customer has paid or not. For example, in a case where a customer places an order worth $50 but has not paid for it yet, the paid amount field will appear as $50 – Not Paid.
- Order Sent: The Order sent field shows the time when the order arrived in your store. It is a combination of the time, day, and date of the order.
- Order Wish: In this column will appear the customer’s order with date and time. This is the time and date the customer wishes to receive their order. When the store is set to use time slots, the order wish will include both the order with start and end. The customer expects the order within a time slot.

- Order Expected: The order expected field is also a combination of the time and date when a customer is expecting an order to be delivered. However, this field will have data if a customer places an order and chooses to receive it at a specific time and day even though the store might be open at the time of order placement. Therefore, it differs from the Order Wish discussed in the previous point.
Order Statuses
An order in your store can have one of four statuses. Every new order has an Open status. The status changes when you click to open, accept or reject an order.
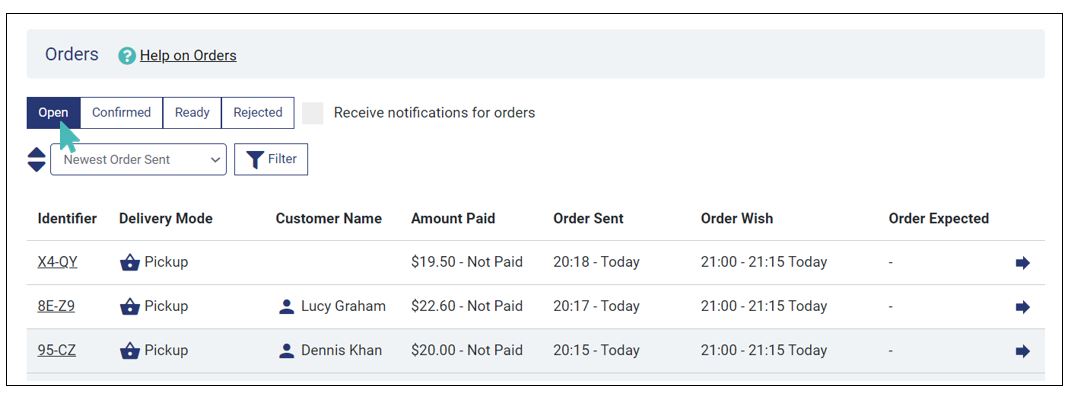
- Open: The default location for any order taking place is the ‘Open’ tab present in the order menu. It represents that the order hasn’t been processed. Further, your order ‘open’ tab can be taken as your order inbox where new orders arrive.
- Confirmed: The confirmed orders tab displays all orders you have agreed to process. Orders are automatically moved from the open tab to this tab once you confirm them. You can also confirm the order and mark them as ready or provide a time estimate of when they should be ready.
Viewing Confirmed Orders 
- Ready: Once you have confirmed orders, you go ahead to process them so you can serve customers and that deliveries and pickups can be fulfilled. Orders listed under the ‚Ready‘ tab are those that have been fulfilled and those waiting to be picked up or delivered.
Viewing Ready Orders 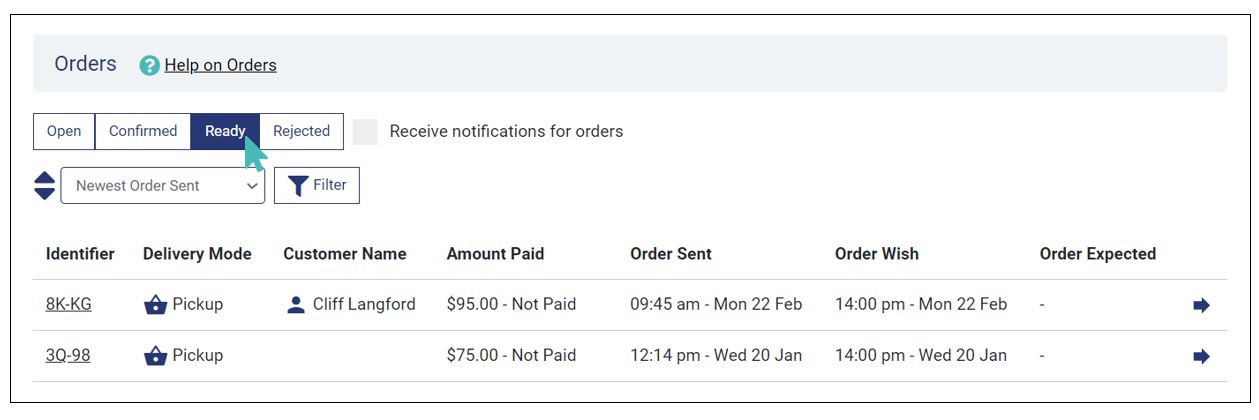
- Rejected: It may so happen that you are unable to process an order. In that case, you can mark the order as ‚Rejected‘. And that particular order will be automatically directed to the ‚Rejected‘ tab in the order menu. The customer should be notified about the order rejection. You could provide a professional courtesy to check if the customer is interested in making some alternative orders.
Viewing Rejected Orders 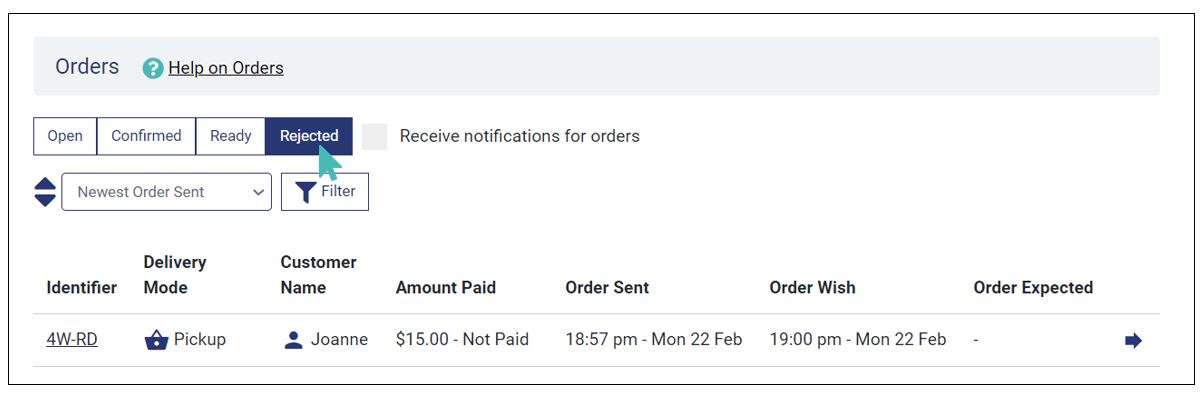
View the Details of an Order
Order details refer to the complete information of a particular order. You can view the details of every order placed in your store from your orders page by clicking on it regardless of its status.
The Order Details page shows:
- Order Number: A unique identifier generated by GonnaOrder at the time of order placement and which can be used for internal communication as well as communication with the customer.
- Order Type: An identifier indicating the type of order. Can be Pickup, Deliver or Serve.
- User type and name: The user type and name show the type of user that placed the order and their name. There are two icons to distinguish customers and store operators.
- John Doe: A user icon shows an order that a customer placed in your store. Notice that a customer’s name is written in full.
- Mohammed F: Orders placed by store operators via the order capture feature are marked with the editing icon. The first name and the first letter of the operator’s second name appear next to the icon.
In some cases, these two icons will appear on the same order signifying that a store operator placed an order on behalf of a customer. This happens when the customer provides their name to be used for the order.
- Contact Information: Each Order when placed can also include a contact information of the customer. Store owners can contact the customer through WhatsApp or Viber ( as applicable in Customer’s device).
Contact Information 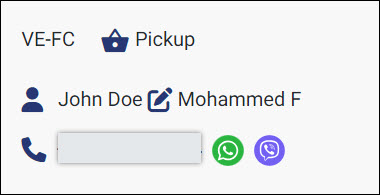
- Location/table and location comment: For table service and delivery orders, Gonnaorder displays the table number or the customer address and the table comment.
- Order Sent: This label identifies the time, day, and date when the order arrived in your store.
- Order wish: This indicates the time/ time slot, day, and date during which the customer would like to receive their order. Time and date are provided by the customer while submitting the order.
Order Wish 
- Order expected: This shows the expected day and time when the order is expected based on store settings or the order processing time estimate provided when a store attendant accepts the order.
- External Order ID: This is an identifier generated by external applications like Powersoft POS and HubRise to mark an order originating from GonnaOrder. The external order ID is sent back to GonnaOrder and updated in the respective field. The ID allows the waiter to find the order on the POS and confirm that the correct details were sent. Only orders that GonnaOrder forward to external order management applications have this field.
- External Delivery ID: The external delivery ID indicates that GonnaOrder has forwarded the order to the last-mile delivery application connected to your store. The ID is generated by the delivery management application e.g., mynext and WooDelivery, and sent back to GonnaOrder. This allows you to cross-check and confirm that delivery orders are actually being copied to WooDelivery, mynext, and any other third-party delivery management apps connected to your store.
- Order amount and Payment status: The order amount is the total value of the offers in the said order. For the payment status, it highlight the whether the customer paid for the order or not. The payment status can either be Paid, Unpaid, Paid Cash, or Paid Card.
- Items included in the order: This is a breakdown of the offers that a customer has included in the order. It shows the name of the offer, the number of items ordered per offer, and the price. If any offers were eligible for discounts, they would be shown here.
- Discount voucher applied: If the customer applied a discount code to their order, then it will appear in the order below order items. The discount voucher code is shown alongside the calculated discount value.
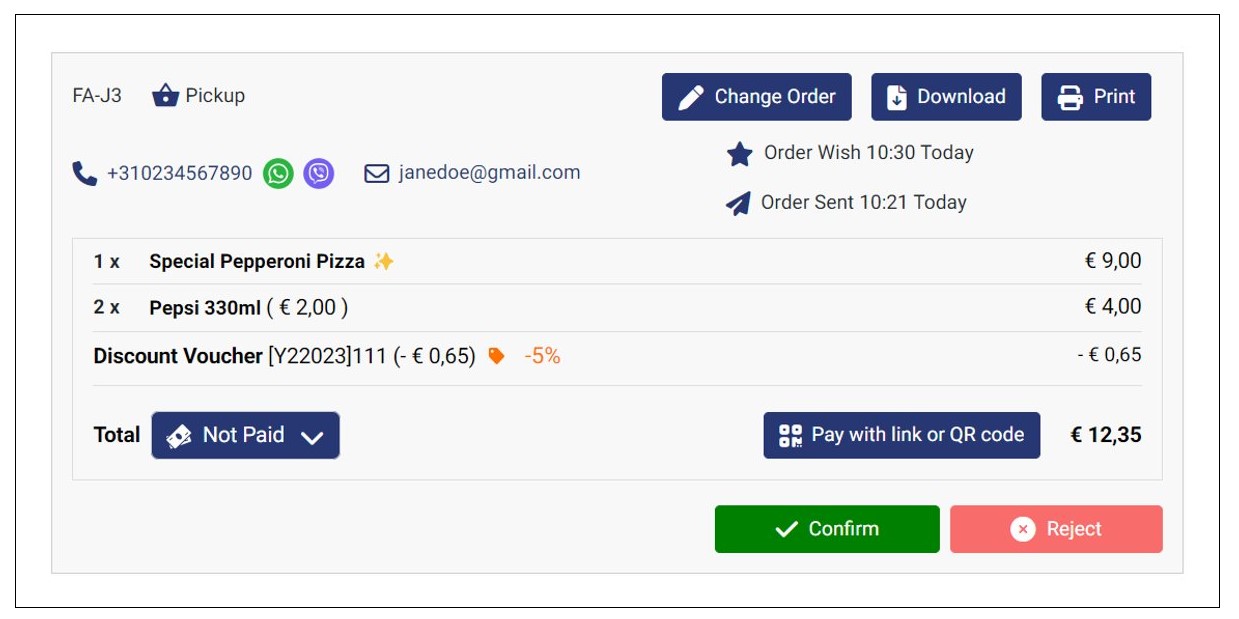
If you have not noticed yet, GonnaOrder displays the time first, then the date and the day whenever applicable. Further, the current day is referred to as Today, the previous day as Yesterday, and the next day as Tomorrow, respectively, instead of the day name. The Order wish time is displayed as either a time slot or static time on both the order details page and the orders list page.
Change the Payment Status of Unpaid Orders
As a store owner, you can change the payment status of unpaid orders from Unpaid to Paid Cash or Paid Card and vice versa. This allows you to mark different orders as paid depending on the offline payment mode used by the customer.
To change the payment status of unpaid orders, go to your orders dashboard and select the unpaid order you wish to change its payment status.
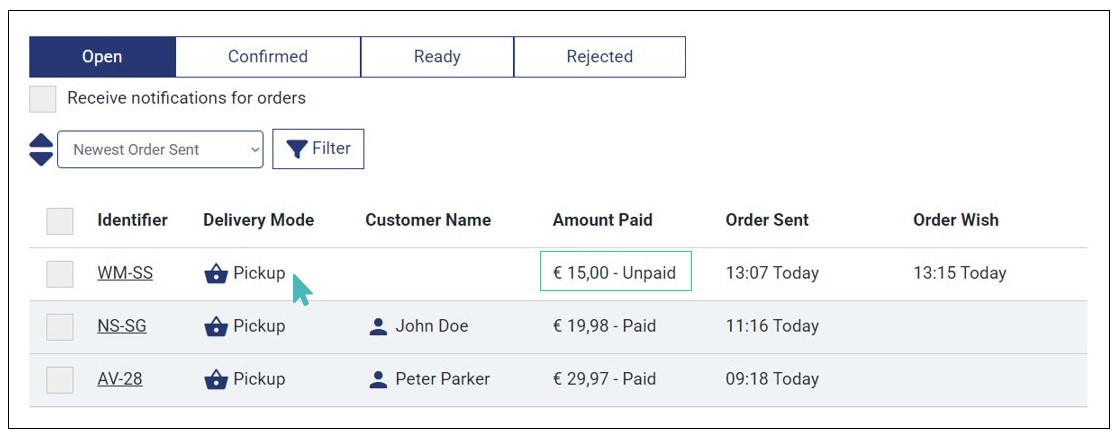
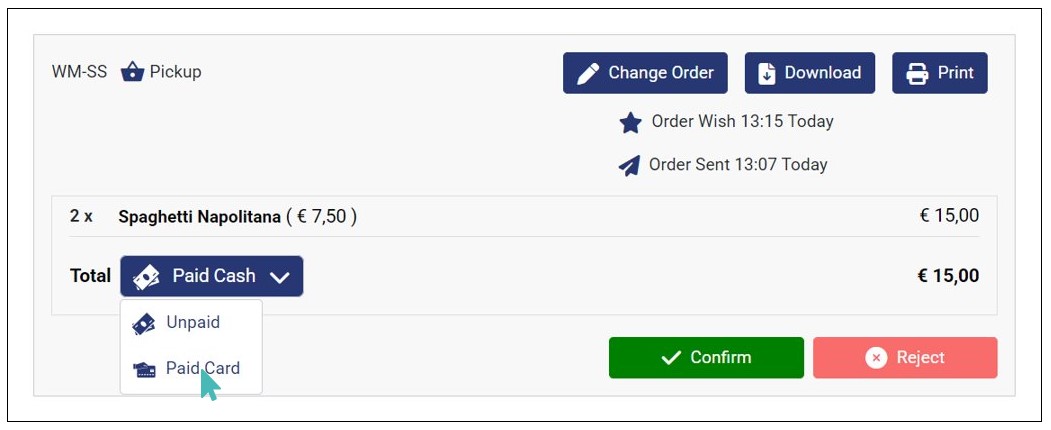
On the order details page, select the payment method used by the customer from the Total dropdown.
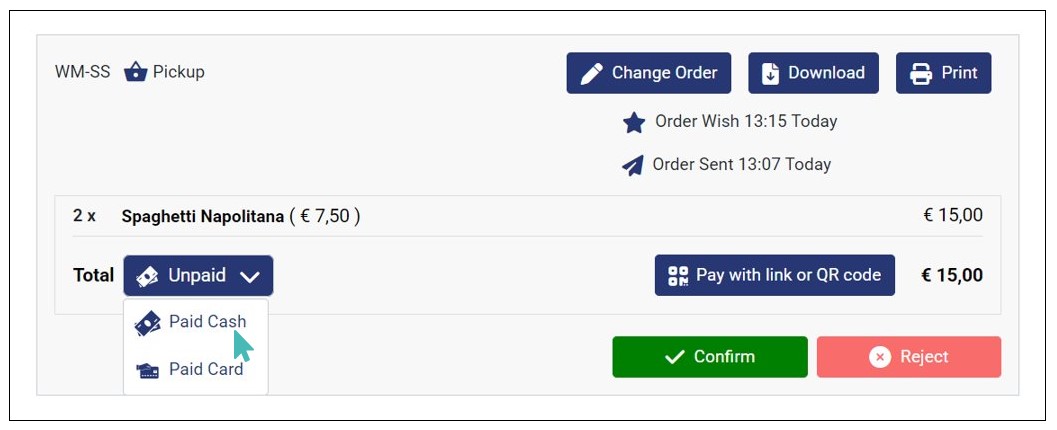
You will see a success notification informing you that the order has been updated on the top right corner of your screen.
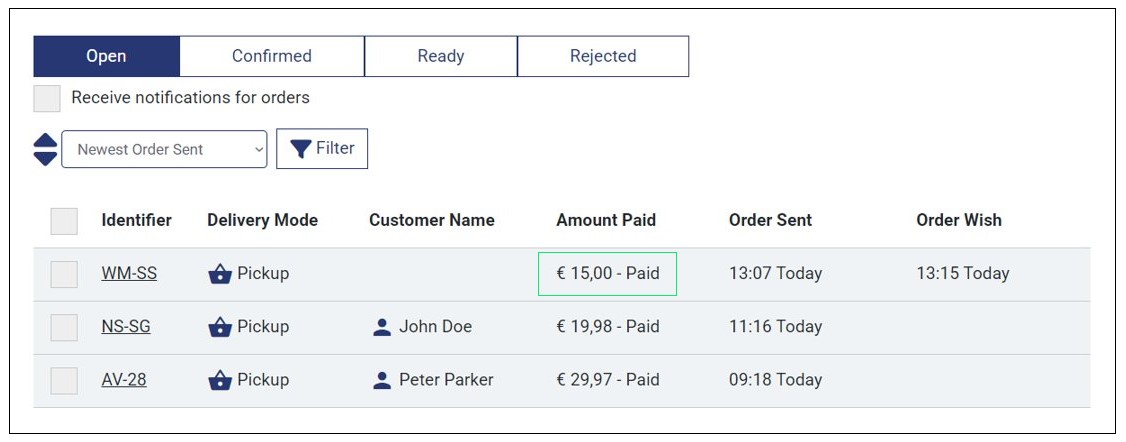
When you view the order again on the dashboard, you will see that it is marked as paid.
You can also switch between different payment statuses, i.e., Unpaid, Paid Cash, and Paid Card, when necessary. For instance, if you had selected Paid Cash, you can change the status back Paid Card if the customer used card to complete the payment.
Note
You can only change the payment status of orders that were not paid online during customer checkout. See more on how to Set Your Preferred Pay Later Option.


